
How to Make Perfect Plunge Cuts in Wood and Drywall with a Multi tool
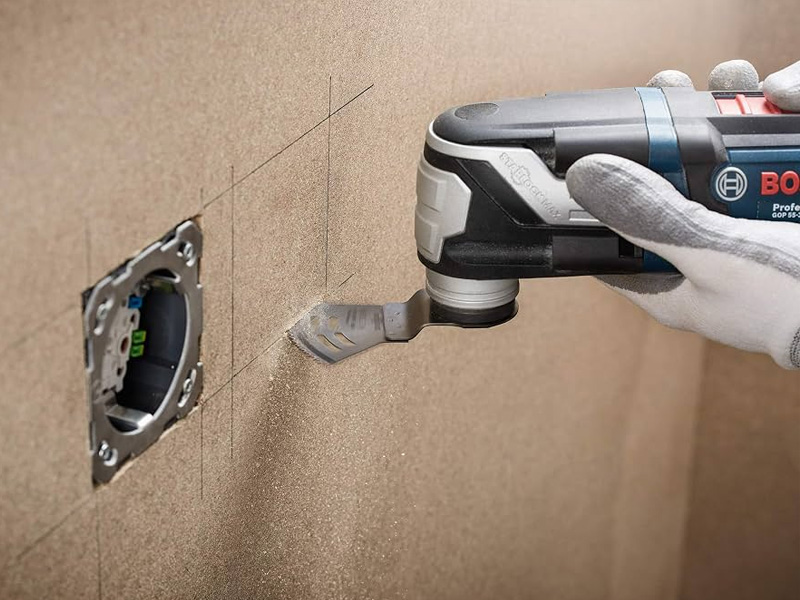
One of the most frustrating things in second-fix carpentry and home renovation is to drill a perfectly straight, clean hole in the middle of a solid piece of material. A regular circular saw won’t drop easily in tight spots, and a hand pad saw often leaves jagged edges and mangled plaster. For these very specific problem-solving tasks, a multi tool is the ultimate problem solver:
Whether it’s sinking a new electrical back box into a finished wall, trimming a section of skirting board in situ or lifting a damaged floorboard without pulling up the whole room, an oscillating tool gives you unsurpassed control. This tool doesn’t spin and kick back like rotary saws but instead vibrates side to side rapidly, so you can drop the blade right into the workpiece with precision. In this guide, you will learn which blades, speeds, and techniques to use to make perfect plunge cuts in wood and plasterboard.
The Mechanics of a Multi Tool Plunge Cut
A plunge cut is a cut made directly into the face of a material, rather than starting from an edge on the outside. Because the blade has to carve its entry point, the risk of the tool skipping across the surface and ruining the surrounding paintwork or timber veneer is incredibly high.
Using an oscillating multi-tool with a micro vibration mechanism minimises the risk. The blade shaves off the material in small amounts instead of ripping it by shaking at a slight angle, usually between 2.5 and 3.2 degrees. This gives the operator full physical control of the entry angle, depth and feed rate of the tool, while the surrounding material remains completely undisturbed.
Selecting the Right Multi Tool Blade
The most important step to getting a clean plunge cut is to choose the right accessory. The wrong tooth configuration will immediately overheat the blade and burn the wood or even shatter the accessory altogether.
Japanese Tooth Blades for Aggressive Wood Cutting
If you’re working with clean timber such as hardwood flooring, softwood joists or MDF skirting boards, without any nails, then a Japanese tooth blade is the best option. These blades have a double row of aggressively ground, razor-sharp teeth, engineered for rapid timber removal.
- They do a very efficient job of clearing the sawdust out of the cut channel, so the blade can’t get bound up.
- They cut cleanly through wood fibres and leave a remarkably smooth finish, usually requiring no sanding.
- They tend to get damaged easily. If you hit one of those hidden screws, the brittle teeth will snap off right away and ruin the blade.

Bi-Metal Blades for Drywall and Hidden Fasteners
Whenever you drill into plasterboard, plasterboard or the old floorboards, always reckon on hidden nails, screws or pipe clips lurking just below the surface. For these unpredictable materials, only a bi-metal (BiM) blade is absolutely necessary.
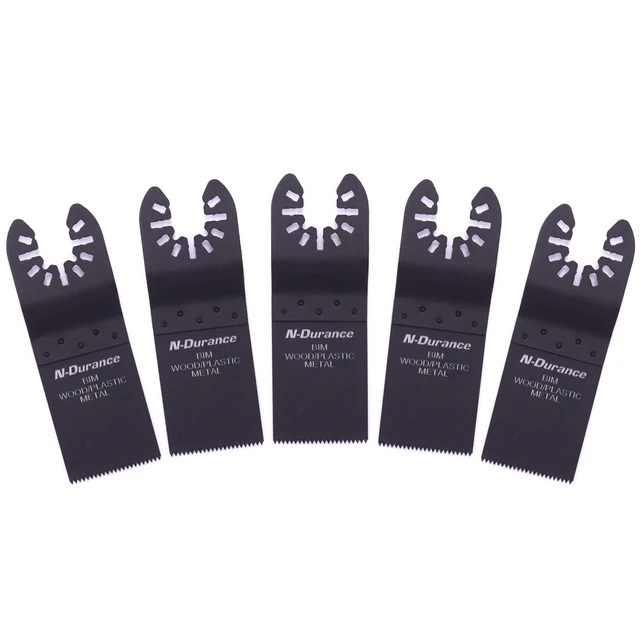
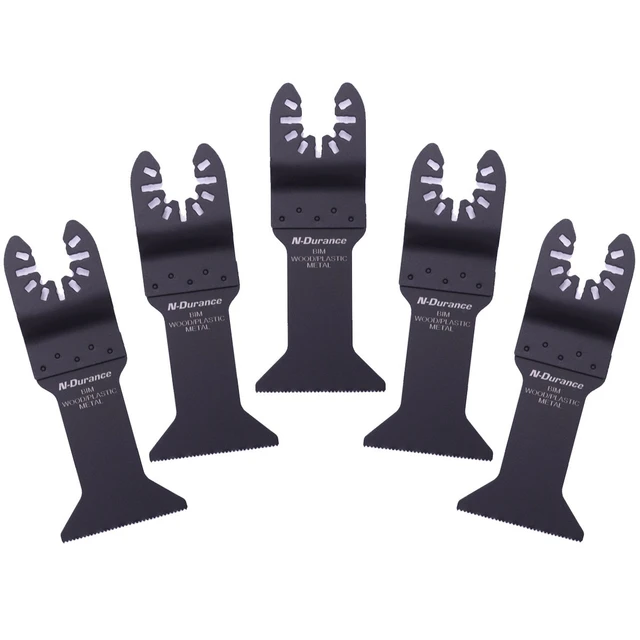
- Bi-metal blades are made by melting high-speed steel teeth onto a flexible carbon steel body so that they can absorb heavy impacts without shattering.
- The teeth are smaller and closer together than Japanese blades, so they cut wood a little slower, but they can chew through embedded steel nails and screws without damage.
- They are the safest and most economical option for general demolition and exploratory plunge cuts where the subsurface is unknown.
The Plunge Technique: Step-by-Step
A successful plunge cut takes patience and the right angle of attack. If you press the blade flat against the material, you are sure to get violent vibration and damage the surface.
1. The Angle of Attack
Do not start a cut by using the flat edge of the blade directly on the workpiece. Instead, tilt the multitool upwards at a 30- to 45-degree angle. Place the blade’s corner edge on the cut line. This reduces the initial surface area in contact with the material, making it easy for the teeth to bite into the wood or plasterboard without skipping across the surface.
2. Establishing the Groove
Turn on the tool and gently press the blade corner into the line you’ve marked. Allow the rapid vibration to do the work; use only minimal downward pressure. When the corner has penetrated a few millimetres into the material, you have successfully established a track.
3. The Rocking Motion
As the blade sinks deeper, gradually pivot the oscillating tool downward until it is perfectly perpendicular to the surface. Gently rock the tool left and right along the cut line. This subtle sweeping motion removes sawdust and plasterboard dust from the kerf (cut channel), keeping the blade from overheating and binding in the hole.
4. Managing Depth
Pay close attention to the depth. Most premium blades have laser-etched depth markers on the sides. When cutting plasterboard, only go deep enough to break through the plasterboard (12.5 mm to 15 mm) to avoid slicing into hidden electrical wires or copper plumbing pipes in the wall cavity.
Tool Control and Speed Management
Today’s oscillating tools have variable speed triggers or adjustable speed dials. The temptation is to crank the tool up to its highest oscillation rate to get the job done quickly, but speed must be well controlled, depending on the material you are cutting.
Friction is the enemy of anyone working with delicate finished materials, such as painted skirting boards or varnished door frames. If you run the tool at full speed in dense timber, it will generate so much heat that it will burn the wood, melt the paint and instantly dull your blade.
- For softwoods and drywall: High speeds are acceptable and clear material quickly.
- For hardwoods and delicate trim: Dial the speed back to a medium setting. This gives you far greater accuracy and prevents ugly friction burns on the finished face of the timber.
- Let the tool dictate the pace: If you have to push hard to make the blade progress, your speed is incorrect, or your blade is blunt.
Quick Reference: Blade and Speed Selection
This quick setup guide for your multitool will help you make a safe and efficient next plunge cut:
| Target Material | Recommended Blade Type | Ideal Speed Setting | Plunge Technique |
| Clean Softwood / Hardwood | Japanese Tooth (High Carbon Steel) | Medium to High | Start at a 45° angle, and rock gently to clear heavy sawdust. |
| Drywall (Stud Walls) | Bi-Metal (BiM) | High | Start with a shallow 30° angle and maintain strict depth control to avoid wiring. |
| Wood with Hidden Nails | Bi-Metal (BiM) | Medium | Start at a 45° angle, and maintain steady pressure when hitting metal. |
| Skirting Boards / Trim | Fine Tooth Wood Blade | Low to Medium | Plunge extremely slowly to prevent paint friction burns. |
| Plastics / PVC Pipe | Bi-Metal (BiM) | Low | Plunge slowly to prevent the plastic from melting on the blade. |
FAQs
Why does my oscillating tool smoke when cutting wood?
Smoke is generated by too much friction, meaning the blade is overheating. This happens when you push too hard, run the tool at full speed, or don’t rock the blade to clear the sawdust. It may also mean your blade is completely dull and needs immediate replacement.
Can I cut directly over a wall stud through drywall?
Yes, but you need to change to a bi-metal blade. Plasterboard screws are used to attach plasterboard to studs. If you hit a screw with a regular wood blade in a stud, you will destroy the blade immediately. The bi-metal blade will cut through the plasterboard, the timber stud and any hidden screws in its path, all at one go.
How do I stop the blade from slipping when starting a cut?
Always begin at an angle, using only the corner of the blade. If you are cutting a very polished surface (e.g., a laminate worktop or varnished floorboard), put a strip of heavy-duty masking tape over your cut line. The tape provides immediate traction for the teeth of the blade so the tool doesn’t skate over the slippery surface.
What is the difference between OIS and Starlock blades?
OIS is the established flat-fitting accessory system used by many leading brands (e.g., older DeWalt and Makita models). Starlock is a newer, cup-shaped 3D interface for heavy-duty torque transfer. To use Starlock blades with standard OIS machines, you will need a dedicated adapter, so be sure to check the manual for your specific tool.
Conclusion
Once you have mastered the plunge cut, your oscillating multi tool is no longer just a tool for solving a problem but a tool of absolute precision. Choose the appropriate Japanese or bi-metal blade, set your variable speed to prevent friction burns, and always use the angled plunge method for flawless cutouts in wood and plasterboard without any collateral damage to the surrounding area.
To achieve the best results on site or at home, you need reliable kit that provides advanced vibration control and consistent power delivery. We highly recommend that you visit our main category page for the full range of body-only machines and full accessory kits. The professional-grade models have the torque, speed control, and quick-change capabilities you need to quickly and safely tackle any awkward cutting task.
Need some help with your order? Our new help centre has a wide range of helpful articles and guides to assist you!
If you have any additional queries, please do not hesitate to contact us below: