
How to Safely Test a Car Battery and Alternator with a Multimeter
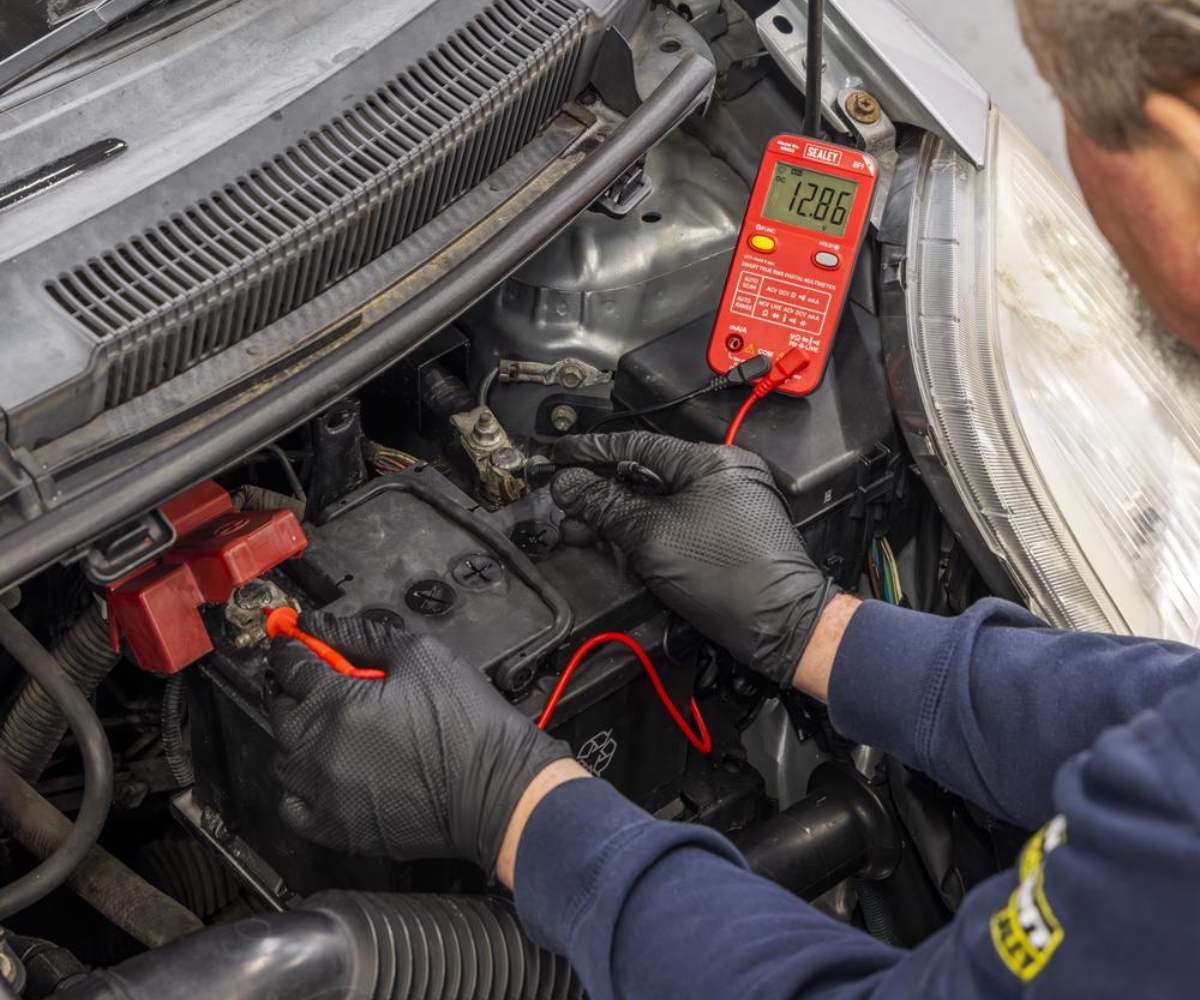
A dead car battery is a frustrating problem, especially when you’re not sure if the problem is the battery or the alternator. Fortunately, one of the easiest and most useful tools for diagnosing common electrical issues with your vehicle is a multimeter. By measuring voltage at the battery terminals, you can quickly identify potential charging problems without expensive diagnostic equipment.
Whether you are a professional mechanic or just doing maintenance on your own car, knowing how to properly use a digital multimeter can save you time, money and unnecessary replacement parts. In this guide we’ll explain how to safely test a 12V car battery, check alternator performance and understand what your readings mean.
Setting Up Your Multimeter for a 12V Car Battery
Before you test the electrical system in your car, it’s important to set up your multimeter correctly. Most cars have a 12V electrical system . The actual voltage will vary depending on the condition of the battery and if the engine is running .
For this test you’ll need a digital multimeter that can read DC voltage, along with the red and black test leads that come with it.
How to Set Up Your Multimeter
- Turn off the engine: Make sure the ignition and electrical accessories are switched off before starting your initial test.
- Connect the test leads: Insert the black lead into the COM socket and the red lead into the socket marked V or VΩ.
- Select DC voltage: Turn the dial to the DC voltage setting, typically indicated by a V with a solid and dashed line.
- Choose the correct range: If your multimeter has manual ranging, select 20V DC. If it’s auto-ranging, simply select DC voltage.
- Identify the battery terminals: Locate the positive (+) and negative (-) terminals, ensuring they’re accessible and free from excessive corrosion.
Once your multimeter tester is configured, you’re ready to begin measuring your battery’s voltage.
Safety Tip: Never select the current (A) or resistance (Ω) setting when testing voltage across a connected car battery. Keep the red lead in the voltage socket, avoid bridging the battery terminals with metal objects and inspect your test leads for damage before use. Work in a ventilated area and avoid sparks or flames near the battery.
How to Test a Car Battery with a Multimeter
The first step in diagnosing a battery problem is checking its resting voltage. This is a good indication of the state of charge of the battery before the alternator kicks in.
For best results, allow the vehicle to sit with the engine off for several hours, preferably overnight. If the vehicle was recently driven or charged, surface charge may temporarily increase the reading.
Step-by-Step Battery Voltage Test
- Switch everything off: Ensure the engine, headlights, radio and other electrical accessories are switched off.
- Connect the black probe: Place the black multimeter probe against the negative (-) battery terminal.
- Connect the red probe: Place the red probe against the positive (+) battery terminal.
- Read the display: Your digital multimeter will display the battery’s voltage.
- Compare your results: Use the table below to understand what the reading suggests about the battery’s condition.
Understanding Car Battery Voltage Readings
The following figures are approximate guidelines for a conventional 12V lead-acid starter battery at rest.
| Voltage Reading | Battery Condition | What It Means |
|---|---|---|
| 12.6V–12.8V | Fully charged | Battery has a healthy resting state of charge |
| 12.4V–12.5V | Partially charged | Battery may benefit from charging |
| 12.2V–12.3V | Around half charged | Battery charge is low and should be investigated |
| 12.0V–12.1V | Heavily discharged | Battery needs recharging |
| Below 12.0V | Severely discharged | Battery may be flat or have an underlying problem |
These numbers are a good starting point but voltage alone can’t tell you if a battery is healthy. The result can be influenced by temperature , battery chemistry and recent charging.
For example, a battery showing 12.7V may appear fully charged but still struggle to deliver sufficient current when starting the engine. If your vehicle continues to experience starting problems despite a normal resting voltage, a dedicated battery load or conductance test may be required.
What If Your Car Battery Voltage Is Too Low?
If your meter reads below 12.4 volts, you may need to charge the battery before proceeding with any further testing.
A low reading does not necessarily mean the battery needs replacing. A battery can be discharged by frequent short trips, leaving electrical accessories on, or by a vehicle sitting idle for a long time.
Charge the battery with a suitable charger and recheck the resting voltage. If the battery continually loses its charge then further investigation may be needed to determine if there is battery deterioration, an electrical drain or a fault in the charging system.
How to Test a Car Alternator with a Multimeter
If your battery appears to be in reasonable condition but continues to lose charge, the alternator could be responsible.
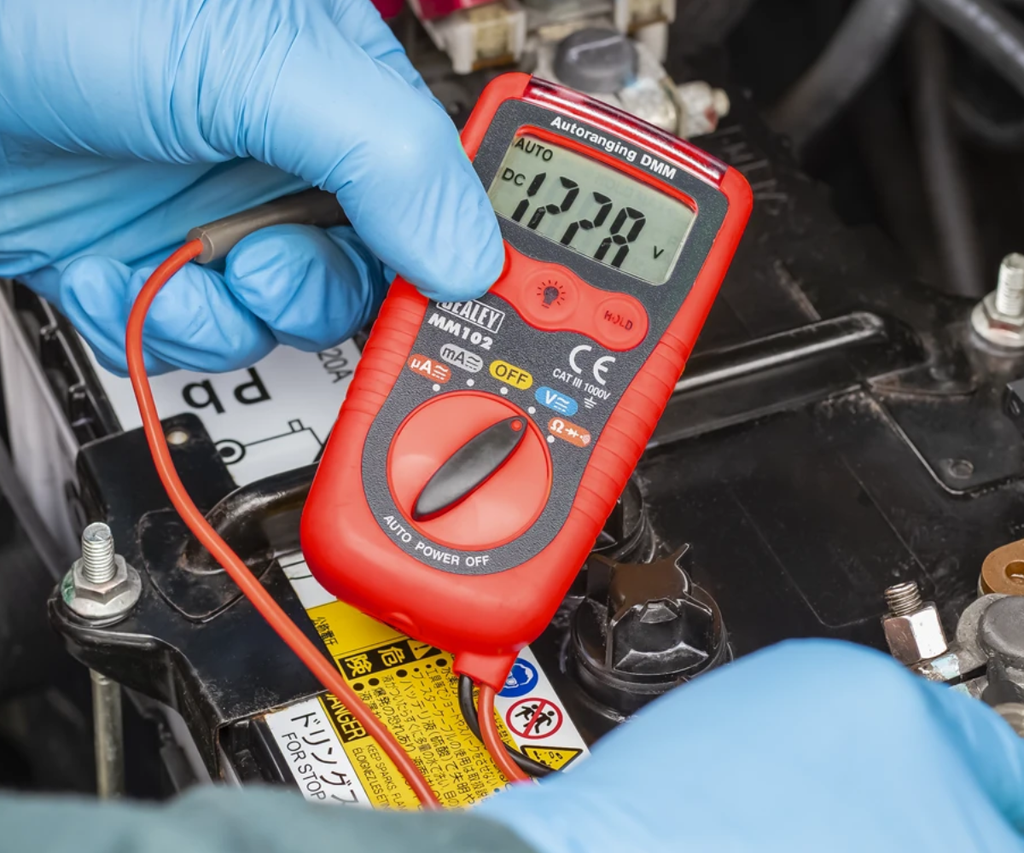
The alternator generates electrical power while the engine is running, supplying the vehicle’s electrical systems and recharging the battery.
Using a multimeter tester, you can check whether the charging system is producing an appropriate voltage without removing the alternator from the vehicle.
Step-by-Step Alternator Voltage Test
- Connect your multimeter: With the engine switched off, connect the black probe to the negative battery terminal and the red probe to the positive terminal.
- Secure the test leads: Ensure both probes or suitable insulated clips are securely positioned, with all cables clear of belts, fans and other moving components.
- Start the engine: Once the leads are safely positioned, start the vehicle and allow it to idle.
- Check the voltage: Observe the reading on your digital multimeter with the engine running.
- Switch on electrical accessories: Turn on the headlights, heated rear window and cabin blower to place additional demand on the charging system.
- Monitor the reading: Check whether the charging system maintains an appropriate voltage as electrical demand increases.
Never reach into the engine bay to adjust loose probes while the engine is running. If the connections are unstable, switch off the engine before repositioning them.
Understanding Alternator Voltage Readings
On many conventional 12V charging systems, you can expect a running voltage of approximately 13.8V to 14.7V. However, modern vehicles with smart charging systems may intentionally operate outside this range.
| Voltage Reading | Possible Interpretation |
|---|---|
| 13.8V–14.7V | Typical charging voltage on many conventional systems |
| 13.0V–13.7V | May indicate reduced charging, depending on vehicle design and operating conditions |
| Around 12.6V or below | May indicate the battery is not receiving charge on a conventional system |
| Consistently above 15.0V | May indicate overcharging or a voltage regulation problem |
Always compare your results with the vehicle manufacturer’s specifications, particularly when testing vehicles fitted with intelligent alternator control or stop-start technology.
What Happens When You Add Electrical Load?
Using headlights, heated rear window and blower increases the electrical load on the alternator.
In a conventional charging system, you might see a temporary voltage drop until the regulator reacts to the added load. In general, the voltage should be within the manufacturer’s range for charging.
If the reading drops toward resting battery voltage and keeps dropping while the engine is running, it may mean the alternator is having trouble keeping up with electrical demand.
But a low voltage doesn’t necessarily mean your alternator is bad. Loose connections, damaged wiring, worn drive belts and battery management systems can also affect the results.
Important: A multimeter voltage test provides an initial assessment of charging performance, but it cannot conclusively diagnose an alternator fault. Further electrical testing may be necessary before replacing components.
Common Mistakes to Avoid When Using a Multimeter
Although multi meters are relatively straightforward to operate, incorrect settings or testing techniques can produce misleading results or create unnecessary safety risks.
A few of the most common mistakes are:
- Selecting the wrong measurement mode: Always use DC voltage when testing a car battery or charging system.
- Using the incorrect input socket: The red lead must be connected to the voltage input, not the current measurement socket.
- Testing immediately after driving: Surface charge can produce an artificially high resting battery reading.
- Allowing probes to touch: Accidentally connecting the positive and negative terminals with a conductive object can cause a dangerous short circuit.
- Ignoring battery condition: A battery may show a normal resting voltage while still failing under starter load.
- Overlooking vehicle-specific charging systems: Smart alternators may operate at different voltages depending on battery condition and electrical demand.
Taking a few moments to check your equipment and testing procedure can help you obtain more reliable results while protecting yourself and your vehicle.
How to Store and Maintain Your Multimeter
A good multimeter is a great addition to any automotive toolkit, but like all electronic test equipment it needs to be cared for if it is to remain accurate and perform well.
Tools in garages, workshops and vehicles can be subject to cold temperatures, moisture, dust and accidental impact. If equipment isn’t stored properly, these conditions can slowly damage sensitive electrical parts.
Tips for Looking After Your Multimeter
- Keep it dry: Store your multimeter in a dry toolbox or protective case, away from water and excessive humidity.
- Avoid extreme temperatures: Follow the manufacturer’s recommended storage temperatures and allow a cold tool to reach room temperature before use if condensation is present.
- Protect the test leads: Avoid tightly wrapping cables around the device, as this can damage the internal conductors.
- Check the batteries: Replace weak internal batteries when indicated and remove them before prolonged storage if recommended by the manufacturer.
- Inspect before use: Check probes, cables and input sockets for wear or damage.
- Keep it clean: Wipe the casing with a dry or slightly damp cloth, avoiding harsh chemicals and excessive moisture.
If you’re regularly testing batteries, diagnosing electrical faults or maintaining multiple vehicles, investing in a quality digital multimeter with clear readings, reliable test leads and suitable protective features can make your work considerably easier.
Conclusion: Diagnose Battery Problems with Confidence
Learning how to test a car battery and alternator with a multimeter is a handy skill for anyone doing vehicle maintenance.
By checking the resting battery voltage and watching the charging voltage with the engine running, you can catch electrical problems before they get expensive.
Remember that voltage checks are a first indicator, not a full diagnosis. If your battery is still running down or your alternator is reading abnormally, you may need to do some additional testing.
If you’re replacing an older multi meter or upgrading your automotive testing equipment, check out the range of multimeters and electrical testing tools at Toolden to find the right pieces of equipment for your next job.
Multimeter FAQs
How do you test a car battery with a multimeter?
To test a car battery, set your multimeter to 20V DC (or DC voltage if using an auto-ranging model). With the engine switched off, connect the red probe to the positive terminal and the black probe to the negative terminal. A fully charged 12V lead-acid battery typically reads between 12.6V and 12.8V after resting, while lower readings may indicate that the battery needs charging.
What should a 12V car battery read on a multimeter?
A healthy, fully charged 12V lead-acid car battery should generally read around 12.6V to 12.8V when the engine is switched off and the battery has been allowed to rest. Readings around 12.2V suggest the battery is approximately half charged, while anything below 12.0V indicates significant discharge. However, a digital multimeter measures voltage rather than overall battery health, so additional testing may be required.
Can you test an alternator with a multimeter?
Yes, a multimeter tester can help identify potential alternator problems by measuring battery voltage while the engine is running. On many conventional charging systems, a reading between 13.8V and 14.7V indicates that the alternator is supplying charging voltage. However, modern smart charging systems may operate outside this range, so always check the vehicle manufacturer’s specifications.
Why does my car battery keep dying even though the alternator is working?
If your alternator appears to be charging correctly but your battery continues to lose power, several other issues could be responsible. These include an ageing battery, loose or corroded terminals, short journeys that prevent adequate recharging or a parasitic electrical drain when the vehicle is switched off. Using a multi meter to monitor battery voltage can help identify charging problems, although further testing may be needed to determine the exact cause.
What type of multimeter is best for testing car batteries?
A digital multimeter with DC voltage measurement, a clear display and reliable test leads is ideal for basic automotive battery testing. Auto-ranging models are particularly convenient because they automatically select the appropriate measurement range. For more advanced vehicle diagnostics, consider multi meters with additional functions such as continuity testing, resistance measurement and min/max recording. Always choose a model suitable for the electrical systems you intend to test.
Need some help with your order? Our new help centre has a wide range of helpful articles and guides!
If you have any additional queries, please do not hesitate to contact us below: